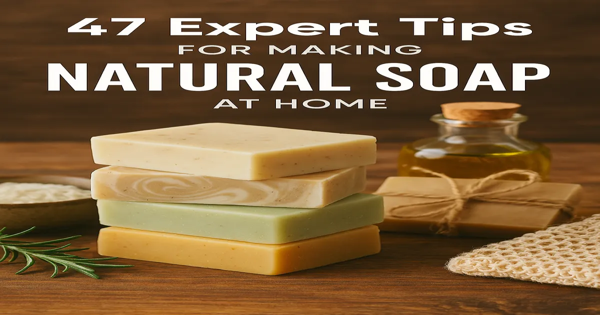
47 Expert Tips for Making Natural Soap at Home
Making handmade soap is both a science and an art. Whether you're a beginner or an experienced soap maker, understanding key techniques can help you create high-quality bars with perfect texture, lather, and longevity. From selecting the right ingredients to mastering safety precautions, small details make a big difference.
In this guide, you'll find essential soap-making tips covering everything from measuring and mixing to curing and storage. These practical insights will help you avoid common pitfalls, improve your results, and take your soap-making skills to the next level. Whether you're crafting for personal use, gifts, or a small business, these expert tips will ensure every batch turns out just right.
1. Use distilled water—minerals in tap water disrupt saponification.
Tap water contains minerals like calcium and magnesium, which can react with lye and cause unwanted soap scum or inconsistent results. Using distilled water ensures a smooth saponification process and prevents unexpected issues.
2. Pre-measure everything (oils, lye, additives) to avoid mid-process chaos.
Soap-making requires precise measurements. Pre-weighing ingredients beforehand helps prevent mistakes, ensures accuracy, and keeps the workflow smooth, reducing the risk of rushed errors.
3. Sunflower oil adds vitamin E and acts as a natural preservative.
Sunflower oil is rich in vitamin E, which provides antioxidant benefits, helping to extend the shelf life of soaps while also nourishing the skin.
4. Limit coconut oil to 15–20% to prevent dryness.
Coconut oil is excellent for creating a hard, cleansing bar with great lather, but using too much can strip the skin of its natural oils, leading to dryness. Keeping it within 15–20% balances cleansing and moisture.
5. Kaolin clay boosts bar hardness and silkiness.
Adding kaolin clay enhances the hardness of soap bars, making them last longer, and imparts a silky, luxurious feel to the lather, improving the overall texture.
6. Store lye in airtight containers labeled clearly.
Lye absorbs moisture from the air and can become clumpy or less effective if exposed. Storing it in a well-sealed, clearly labeled container ensures safety and maintains its potency.
Pomace-grade olive oil contains more unsaponifiables and fine particles that accelerate trace, meaning the soap thickens faster. This is useful when making designs requiring quick setting but may limit intricate swirling.
8. Pre-infuse oils with herbs (e.g., calendula) for added benefits.
Infusing oils with botanicals before using them in soap-making allows beneficial compounds, colors, and scents to transfer naturally, enhancing the therapeutic and aesthetic qualities of the soap.
9. Use a digital scale—never eyeball measurements.
Precise ingredient ratios are crucial for soap-making chemistry. A digital scale ensures accuracy, preventing lye-heavy soap or a failed batch due to miscalculations.
10. Label containers to avoid mix-ups.
Ingredients like lye, oils, and additives can look similar but have very different properties. Clearly labeling containers prevents costly and potentially dangerous mistakes.
11. Try babassu oil as a coconut oil alternative for sensitive skin.
Babassu oil shares similar cleansing and lathering properties with coconut oil but is gentler on sensitive or dry skin, making it a great substitute.
12. Add colloidal oats for gentle exfoliation and eczema relief.
Colloidal oatmeal soothes irritated skin, reduces inflammation, and provides gentle exfoliation, making it ideal for sensitive skin and conditions like eczema.
13. Wear gloves, goggles, and long sleeves when handling lye.
Lye is highly caustic and can cause burns if it comes into contact with skin or eyes. Wearing protective gear ensures safety while handling lye and prevents accidental exposure.
14. Mix lye in a ventilated area (open windows/fan).
When lye dissolves in water, it releases fumes that can be irritating or harmful if inhaled in an enclosed space. Good ventilation helps disperse the fumes quickly, reducing exposure.
15. Always add lye to water—never the reverse!
Pouring water onto lye can cause a dangerous, sudden reaction, leading to splashes or even a lye "volcano." Always add lye slowly to water while stirring to prevent violent reactions.
16. Keep vinegar nearby to neutralize spills.
While vinegar won't completely neutralize lye in soap mixtures, it can help dilute and neutralize small lye spills on surfaces. However, never use vinegar on skin burns—rinse with cool water instead.
17. Use stainless steel or heat-safe plastic for lye mixing (no aluminum!).
Aluminum reacts with lye, producing hydrogen gas, which is flammable and dangerous. Stick to stainless steel, heavy-duty plastic, or heat-resistant glass for lye solutions.
18. Test soap pH after curing (aim for 7–10).
Fully cured soap should have a pH between 7 and 10 to be safe for skin. Too high a pH (above 10) may indicate excess lye, while too low a pH can mean incomplete saponification.
19. Label lye containers with warnings to prevent accidents.
Clearly marking lye containers prevents accidental misuse or mix-ups. This is especially important if storing it near other ingredients, as mistaking lye for sugar or salt can be hazardous.
20. Store lye out of reach of children and pets.
Lye is highly dangerous if ingested or spilled. Keeping it securely stored in a high, locked, or out-of-reach location ensures safety in households with children and pets.
21. Use a stick blender for faster emulsification.
A stick blender (also called an immersion blender) speeds up the mixing process, helping the oils and lye water reach trace faster than hand stirring. This saves time and ensures a smooth emulsion.
22. Spritz with 99% alcohol to prevent soda ash.
Soda ash is a harmless but powdery white residue that forms on soap surfaces when exposed to air. Spritzing freshly poured soap with 99% isopropyl alcohol helps prevent its formation.
23. Cover molds with plastic wrap during curing.
Covering soap molds with plastic wrap prevents air exposure, which can lead to soda ash or uneven surfaces. This is especially useful for cold process soaps.
24. Cure in a warm, dry room with airflow.
Proper curing allows excess water to evaporate, making soap harder and longer-lasting. A well-ventilated, warm environment speeds up the curing process and prevents issues like excess moisture retention.
25. Add sodium lactate (1 tsp per pound of oils) for harder bars.
Sodium lactate, a natural salt derived from lactic acid, helps harden soap bars, reducing cure time and making them last longer when used. It also improves unmolding from silicone molds.
26. Insulate molds with towels for even saponification.
Keeping soap warm during the initial saponification process ensures an even reaction and helps encourage the gel phase, leading to brighter colors and a smoother texture.
27. Freeze milk-based soaps (goat milk, coconut milk) to prevent overheating.
Milk-based soaps contain natural sugars, which can cause excessive heat buildup. Freezing or chilling the lye-milk mixture before mixing with oils prevents scorching and discoloration.
28. Use a heating pad under molds in cold climates to ensure gel phase.
In colder environments, soap may not fully gel, leading to a softer or uneven texture. A heating pad under molds provides consistent warmth to promote full gel phase and vibrant colors.
29. Rebatch seized soap by grating, steaming, and remolding.
If soap seizes (becomes thick and unworkable), it can be salvaged by grating it down, gently heating it with steam or a slow cooker, and remolding it. This technique is also useful for incorporating new additives or colors.
30. Essential oils at 3–5% of oil weight (e.g., lavender, peppermint).
Essential oils add natural fragrance and skin benefits to soap, but using too much can cause irritation. A safe range is 3–5% of the total oil weight to ensure a balanced, long-lasting scent.
31. Phthalate-free fragrance oils for long-lasting scents (test for sensitivity).
Phthalate-free fragrance oils are a safer choice, as phthalates have been linked to health concerns. Always test fragrance oils in small batches to check for skin sensitivity and scent retention.
32. Turmeric, spirulina, cocoa for natural colors.
These natural ingredients provide beautiful, earthy tones: turmeric for warm yellows, spirulina for green, and cocoa powder for brown, without synthetic dyes.
33. Avoid fresh botanicals (they rot)—use dried flowers or herbs.
Fresh plant material contains moisture, which can cause mold or decay in soap. Using dried herbs and flowers prevents spoilage and ensures a longer-lasting, aesthetically pleasing bar.
34. Swirl with a chopstick for marbled designs.
A simple chopstick is an effective tool for swirling different colors in soap, creating artistic marble or swirl effects that enhance visual appeal.
35. Layer colors for ombre effects—pour at different trace stages.
To create a smooth gradient or ombre effect, pour different layers at varying trace stages, allowing each layer to set slightly before adding the next.
36. Use activated charcoal for sleek black bars or detoxifying properties.
Activated charcoal gives soap a deep black color and is known for its ability to absorb impurities and toxins, making it great for clarifying and cleansing soaps.
37. Rebatch soft soap by grating and melting with water.
If a soap batch is too soft or didn't turn out as expected, it can be salvaged by grating it down, adding a small amount of water, and slowly melting it to reshape into new bars.
38. Reduce castor oil to 5% if it irritates skin.
Castor oil enhances lather but can be too strong for sensitive skin in high amounts. Keeping it at or below 5% prevents potential irritation while still benefiting the soap’s texture.
39. Add honey to loosen seized soap.
Seized soap (hardened too quickly) can sometimes be loosened by adding a bit of honey. The natural sugars in honey help soften the mixture, making it easier to work with.
40. Repurpose failed batches as laundry soap.
If a soap batch isn’t suitable for skin (due to mistakes in formulation or excess lye), it can still be useful as a cleaning or laundry soap instead of being wasted.
41. Gift in muslin bags with handwritten labels.
Presenting handmade soap in muslin bags with handwritten labels adds a rustic and personal touch, making them ideal for gifts, craft fairs, or special occasions.
42. Fix “false trace” by gently reheating the mixture.
False trace happens when solid oils thicken before true emulsification. If this occurs, gently warming the mixture helps fully incorporate the oils and lye.
43. Prevent glycerin rivers (translucent streaks) by avoiding overheating.
Glycerin rivers appear as clear streaks in soap and occur when excessive heat causes uneven distribution of glycerin. Keeping temperatures moderate and using lower water content helps prevent them.
44. Cure soap 4–6 weeks for longer-lasting bars.
Cold process soap needs time to evaporate excess water and complete saponification. A 4–6 week curing period results in harder, longer-lasting bars with a gentler lather.
45. Store in breathable paper in a cool, dry place.
Storing soap in breathable materials like paper or cloth prevents moisture buildup while allowing continued air circulation. This helps preserve the soap’s quality and prevents sweating or spoilage.
46. Rotate curing soap weekly for even airflow.
Flipping or rotating soap bars during the curing process ensures even drying on all sides, preventing soft spots and promoting uniform hardness.
47. Freeze unused soap dough for future designs.
Soap dough, a pliable form of soap used for decorations, can be frozen to extend its shelf life. This allows for future use in intricate soap designs without waste.
In this guide, you'll find essential soap-making tips covering everything from measuring and mixing to curing and storage. These practical insights will help you avoid common pitfalls, improve your results, and take your soap-making skills to the next level. Whether you're crafting for personal use, gifts, or a small business, these expert tips will ensure every batch turns out just right.
Let’s dive in and perfect your soap-making process!
Ingredients & Prep: The Foundation
1. Use distilled water—minerals in tap water disrupt saponification.
Tap water contains minerals like calcium and magnesium, which can react with lye and cause unwanted soap scum or inconsistent results. Using distilled water ensures a smooth saponification process and prevents unexpected issues.
2. Pre-measure everything (oils, lye, additives) to avoid mid-process chaos.
Soap-making requires precise measurements. Pre-weighing ingredients beforehand helps prevent mistakes, ensures accuracy, and keeps the workflow smooth, reducing the risk of rushed errors.
3. Sunflower oil adds vitamin E and acts as a natural preservative.
Sunflower oil is rich in vitamin E, which provides antioxidant benefits, helping to extend the shelf life of soaps while also nourishing the skin.
4. Limit coconut oil to 15–20% to prevent dryness.
Coconut oil is excellent for creating a hard, cleansing bar with great lather, but using too much can strip the skin of its natural oils, leading to dryness. Keeping it within 15–20% balances cleansing and moisture.
5. Kaolin clay boosts bar hardness and silkiness.
Adding kaolin clay enhances the hardness of soap bars, making them last longer, and imparts a silky, luxurious feel to the lather, improving the overall texture.
6. Store lye in airtight containers labeled clearly.
Lye absorbs moisture from the air and can become clumpy or less effective if exposed. Storing it in a well-sealed, clearly labeled container ensures safety and maintains its potency.
Pomace-grade olive oil contains more unsaponifiables and fine particles that accelerate trace, meaning the soap thickens faster. This is useful when making designs requiring quick setting but may limit intricate swirling.
8. Pre-infuse oils with herbs (e.g., calendula) for added benefits.
Infusing oils with botanicals before using them in soap-making allows beneficial compounds, colors, and scents to transfer naturally, enhancing the therapeutic and aesthetic qualities of the soap.
9. Use a digital scale—never eyeball measurements.
Precise ingredient ratios are crucial for soap-making chemistry. A digital scale ensures accuracy, preventing lye-heavy soap or a failed batch due to miscalculations.
10. Label containers to avoid mix-ups.
Ingredients like lye, oils, and additives can look similar but have very different properties. Clearly labeling containers prevents costly and potentially dangerous mistakes.
11. Try babassu oil as a coconut oil alternative for sensitive skin.
Babassu oil shares similar cleansing and lathering properties with coconut oil but is gentler on sensitive or dry skin, making it a great substitute.
12. Add colloidal oats for gentle exfoliation and eczema relief.
Colloidal oatmeal soothes irritated skin, reduces inflammation, and provides gentle exfoliation, making it ideal for sensitive skin and conditions like eczema.
Lye Safety: Non-Negotiable Rules
13. Wear gloves, goggles, and long sleeves when handling lye.
Lye is highly caustic and can cause burns if it comes into contact with skin or eyes. Wearing protective gear ensures safety while handling lye and prevents accidental exposure.
14. Mix lye in a ventilated area (open windows/fan).
When lye dissolves in water, it releases fumes that can be irritating or harmful if inhaled in an enclosed space. Good ventilation helps disperse the fumes quickly, reducing exposure.
15. Always add lye to water—never the reverse!
Pouring water onto lye can cause a dangerous, sudden reaction, leading to splashes or even a lye "volcano." Always add lye slowly to water while stirring to prevent violent reactions.
16. Keep vinegar nearby to neutralize spills.
While vinegar won't completely neutralize lye in soap mixtures, it can help dilute and neutralize small lye spills on surfaces. However, never use vinegar on skin burns—rinse with cool water instead.
17. Use stainless steel or heat-safe plastic for lye mixing (no aluminum!).
Aluminum reacts with lye, producing hydrogen gas, which is flammable and dangerous. Stick to stainless steel, heavy-duty plastic, or heat-resistant glass for lye solutions.
18. Test soap pH after curing (aim for 7–10).
Fully cured soap should have a pH between 7 and 10 to be safe for skin. Too high a pH (above 10) may indicate excess lye, while too low a pH can mean incomplete saponification.
19. Label lye containers with warnings to prevent accidents.
Clearly marking lye containers prevents accidental misuse or mix-ups. This is especially important if storing it near other ingredients, as mistaking lye for sugar or salt can be hazardous.
20. Store lye out of reach of children and pets.
Lye is highly dangerous if ingested or spilled. Keeping it securely stored in a high, locked, or out-of-reach location ensures safety in households with children and pets.
Techniques for Perfect Bars
21. Use a stick blender for faster emulsification.
A stick blender (also called an immersion blender) speeds up the mixing process, helping the oils and lye water reach trace faster than hand stirring. This saves time and ensures a smooth emulsion.
22. Spritz with 99% alcohol to prevent soda ash.
Soda ash is a harmless but powdery white residue that forms on soap surfaces when exposed to air. Spritzing freshly poured soap with 99% isopropyl alcohol helps prevent its formation.
23. Cover molds with plastic wrap during curing.
Covering soap molds with plastic wrap prevents air exposure, which can lead to soda ash or uneven surfaces. This is especially useful for cold process soaps.
24. Cure in a warm, dry room with airflow.
Proper curing allows excess water to evaporate, making soap harder and longer-lasting. A well-ventilated, warm environment speeds up the curing process and prevents issues like excess moisture retention.
25. Add sodium lactate (1 tsp per pound of oils) for harder bars.
Sodium lactate, a natural salt derived from lactic acid, helps harden soap bars, reducing cure time and making them last longer when used. It also improves unmolding from silicone molds.
26. Insulate molds with towels for even saponification.
Keeping soap warm during the initial saponification process ensures an even reaction and helps encourage the gel phase, leading to brighter colors and a smoother texture.
27. Freeze milk-based soaps (goat milk, coconut milk) to prevent overheating.
Milk-based soaps contain natural sugars, which can cause excessive heat buildup. Freezing or chilling the lye-milk mixture before mixing with oils prevents scorching and discoloration.
28. Use a heating pad under molds in cold climates to ensure gel phase.
In colder environments, soap may not fully gel, leading to a softer or uneven texture. A heating pad under molds provides consistent warmth to promote full gel phase and vibrant colors.
29. Rebatch seized soap by grating, steaming, and remolding.
If soap seizes (becomes thick and unworkable), it can be salvaged by grating it down, gently heating it with steam or a slow cooker, and remolding it. This technique is also useful for incorporating new additives or colors.
Scents, Colors & Creative Flair
30. Essential oils at 3–5% of oil weight (e.g., lavender, peppermint).
Essential oils add natural fragrance and skin benefits to soap, but using too much can cause irritation. A safe range is 3–5% of the total oil weight to ensure a balanced, long-lasting scent.
31. Phthalate-free fragrance oils for long-lasting scents (test for sensitivity).
Phthalate-free fragrance oils are a safer choice, as phthalates have been linked to health concerns. Always test fragrance oils in small batches to check for skin sensitivity and scent retention.
32. Turmeric, spirulina, cocoa for natural colors.
These natural ingredients provide beautiful, earthy tones: turmeric for warm yellows, spirulina for green, and cocoa powder for brown, without synthetic dyes.
33. Avoid fresh botanicals (they rot)—use dried flowers or herbs.
Fresh plant material contains moisture, which can cause mold or decay in soap. Using dried herbs and flowers prevents spoilage and ensures a longer-lasting, aesthetically pleasing bar.
34. Swirl with a chopstick for marbled designs.
A simple chopstick is an effective tool for swirling different colors in soap, creating artistic marble or swirl effects that enhance visual appeal.
35. Layer colors for ombre effects—pour at different trace stages.
To create a smooth gradient or ombre effect, pour different layers at varying trace stages, allowing each layer to set slightly before adding the next.
36. Use activated charcoal for sleek black bars or detoxifying properties.
Activated charcoal gives soap a deep black color and is known for its ability to absorb impurities and toxins, making it great for clarifying and cleansing soaps.
Troubleshooting & Pro Hacks
37. Rebatch soft soap by grating and melting with water.
If a soap batch is too soft or didn't turn out as expected, it can be salvaged by grating it down, adding a small amount of water, and slowly melting it to reshape into new bars.
38. Reduce castor oil to 5% if it irritates skin.
Castor oil enhances lather but can be too strong for sensitive skin in high amounts. Keeping it at or below 5% prevents potential irritation while still benefiting the soap’s texture.
39. Add honey to loosen seized soap.
Seized soap (hardened too quickly) can sometimes be loosened by adding a bit of honey. The natural sugars in honey help soften the mixture, making it easier to work with.
40. Repurpose failed batches as laundry soap.
If a soap batch isn’t suitable for skin (due to mistakes in formulation or excess lye), it can still be useful as a cleaning or laundry soap instead of being wasted.
41. Gift in muslin bags with handwritten labels.
Presenting handmade soap in muslin bags with handwritten labels adds a rustic and personal touch, making them ideal for gifts, craft fairs, or special occasions.
42. Fix “false trace” by gently reheating the mixture.
False trace happens when solid oils thicken before true emulsification. If this occurs, gently warming the mixture helps fully incorporate the oils and lye.
43. Prevent glycerin rivers (translucent streaks) by avoiding overheating.
Glycerin rivers appear as clear streaks in soap and occur when excessive heat causes uneven distribution of glycerin. Keeping temperatures moderate and using lower water content helps prevent them.
Storage & Longevity
44. Cure soap 4–6 weeks for longer-lasting bars.
Cold process soap needs time to evaporate excess water and complete saponification. A 4–6 week curing period results in harder, longer-lasting bars with a gentler lather.
45. Store in breathable paper in a cool, dry place.
Storing soap in breathable materials like paper or cloth prevents moisture buildup while allowing continued air circulation. This helps preserve the soap’s quality and prevents sweating or spoilage.
46. Rotate curing soap weekly for even airflow.
Flipping or rotating soap bars during the curing process ensures even drying on all sides, preventing soft spots and promoting uniform hardness.
47. Freeze unused soap dough for future designs.
Soap dough, a pliable form of soap used for decorations, can be frozen to extend its shelf life. This allows for future use in intricate soap designs without waste.
FAQs
Q: Can I use coffee grounds in soap?
A: Yes! They exfoliate—but use finely ground, dry grounds to avoid mold.
Q: Why does my soap sweat?
A: Glycerin attracts moisture. Wipe with a dry cloth and reduce humidity during storage.
Q: Can I skip curing?
A: No—curing ensures mildness, hardness, and longevity. Patience pays!
Explore:
DIY Soap Calculator
Ready to Create?
With these 47 tips, you’re equipped to craft bars that pamper skin and spark joy. Remember: Mistakes are just stepping stones. Now, suit up, mix boldly, and let your creativity flow. Happy soaping! 🧼✨